|
|||||||
| Sigs and Graphics Show off your sigs/graphics or request your own |
| View Poll Results: Like it? | |||
| Yes |
|
4 | 28.57% |
| No |
|
10 | 71.43% |
| Voters: 14. You may not vote on this poll | |||
 |
|
|
Thread Tools | Search this Thread | Display Modes |
|
#1
 02-08-2006, 12:15 AM
|
||
|
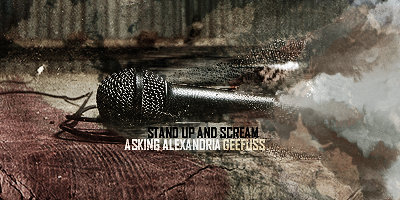
My Seconded Sig!
Hey guys like it?

__________________
Sorry bums, now I'm back! Now I know C++! I use Microsoft Visual C++! 
|
|
|
#3
02-08-2006, 04:03 AM
|
||
|
nope, BG needs more depth and color.
ad a curve layer and a color balance layer think u would be ok.
__________________
#Current:: 
|
|
|
#4
02-08-2006, 09:44 AM
|
||
|
How about this...
 And how to make a good border? Well their are my first sigs.
__________________
Sorry bums, now I'm back! Now I know C++! I use Microsoft Visual C++!
|
|
|
#5
02-08-2006, 02:12 PM
|
|||
|
if its like your 2nd sig ever, then very nice. my 2nd sig i made was terrible. But you need new fonts instead of the default ****. there is a webside you can go to, to download them. i cant remeber the name but someone should know it. ii dont even have ps on my computer anymore its been so long :P. i need to reinstall.
__________________
 Quote:
|
||
|
#7
02-08-2006, 04:21 PM
|
||
|
Thanks for you comments guys.
__________________
Sorry bums, now I'm back! Now I know C++! I use Microsoft Visual C++!
|
|
|
#8
02-08-2006, 04:48 PM
|
||
|
Fonts > http://www.dafonts.com
Using preloaded default fonts isnt always nessicerly bad, i often use: Arial Size: 14 AA Set to: Strong 1 pixel Stroke Stroke: Step 1: Once your signature or other graphic object has been complete you need a border. So Make a new layer.  Step 2: Now that you have another layer make sure its on the very top of all the other layers. Step 3: Go to Select > All (Ctrl+A) Step 4: Go to Edit > Stroke and make your setting look like the following:  Step 5: Hit OK. Now you should have something that looks like this:  Step 6: Duplicate steps 3&4 but change the width of the stroke to "2 px" and change the color to "white" (or any other color you prefer).  Step 7: Duplicate steps 3&4 but change the width of the stroke to "1 px" and change the color to "black".  Step 8: Well you can leave it as is, or you can do something that spices it up a bit more. So now were going to set the bordered layer to "Overlay".  Finished: The above is our final product, have fun : more tuts at www.conscell.com And remember, theirs many ways to do it, just mess around with it and be creative!
|
|
|
#10
02-08-2006, 09:44 PM
|
||
|
Thanks the þrox™!
__________________
Sorry bums, now I'm back! Now I know C++! I use Microsoft Visual C++!
|
|
|
#15
02-10-2006, 07:39 AM
|
||
|
oh, hah i got that a long time ago when, i think it was spazz, and everyone else had that 'what skin are you using thread', and i got that alienware one.

|
|
|
| Currently Active Users Viewing This Thread: 1 (0 members and 1 guests) | |
|
|


 Linear Mode

